The Virtual Terminal interface in Virtuous Raise allows an Admin to process a donation on behalf of a Donor. This terminal is a versatile feature for call centers or any Admin users that may need to complete the online donation process for any number of reasons. This article will cover the process of creating a Virtual Terminal Configuration and also how to process a donation via the Virtual Terminal.
Setting Up a Virtual Terminal Configuration
To begin the setup process, navigate to "Settings" and select "Virtual Terminal" using the left hand menu.
To create a new Virtual terminal Configuration, select the "+ New Configuration" option available in the top right corner of the screen.
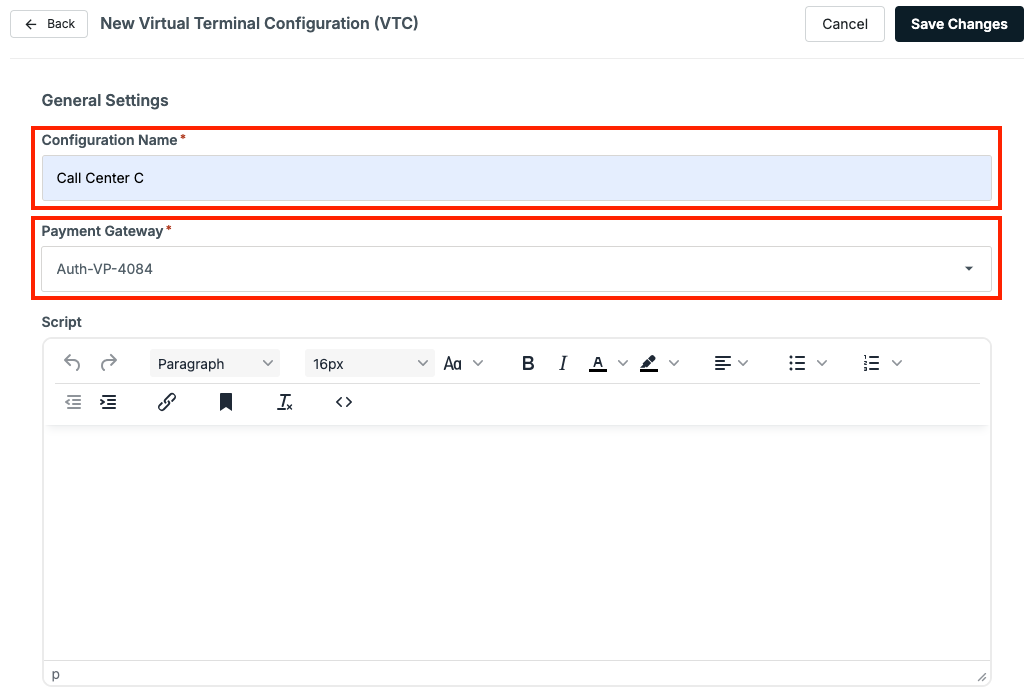
Configuration Name: enter an appropriate name for the Configuration. Be sure the name entered is something that makes sense for others who may also be using this Configuration in the Virtual Terminal.
Payment Gateway: Select the appropriate gateway using the drop-down menu.
Script: This is an optional text box where you can include useful content for the user processing the donation. Example uses include...
- A script to read while taking the donation phone call
- Instructions for how to enter Gifts in the Terminal
- Links to frequently asked questions
Below, you'll find formatting to apply Projects, Premiums, and Segments to donations being processed via this Terminal Configuration.
Projects
Make All Active Projects Available - You can include all active Projects to be available in this Terminal Configuration.
Include Specific Project(s) - To make the Project selection more concise for the user, you can select the option "Include specific project(s)" to define exactly which Projects should be available.
Exclude Specific Project(s) - Alternatively, you can select "Exclude specific projects(s)" to make all active Projects available aside from the exclusions specified in this setup.
Allow Donor to Give to Multiple Projects - Enabling this will allow multiple Projects to be selected in the donation process for this Terminal Configuration.
Premiums
Make All Active Premiums Available - You can include all active Premiums to be available in this Terminal Configuration.
Include Specific Premium(s) - To make the Premium selection more concise for the user, you can select the option "Include specific premium(s)" to define exactly which Premiums should be available.
Exclude Specific Premium(s) - Alternatively, you can select "Exclude specific premium(s)" to make all active Premiums available aside from the exclusions specified in this setup.
 Segments
Make All Active Segments Available - You can include all active Segments to be available in this Terminal Configuration.
Include Specific Segment(s) - To make the Segment selection more concise for the user, you can select the option "Include specific segment(s)" to define exactly which Segments should be available.
Exclude Specific Segment(s) - Alternatively, you can select "Exclude specific segment(s)" to make all active Segments available aside from the exclusions specified in this setup.

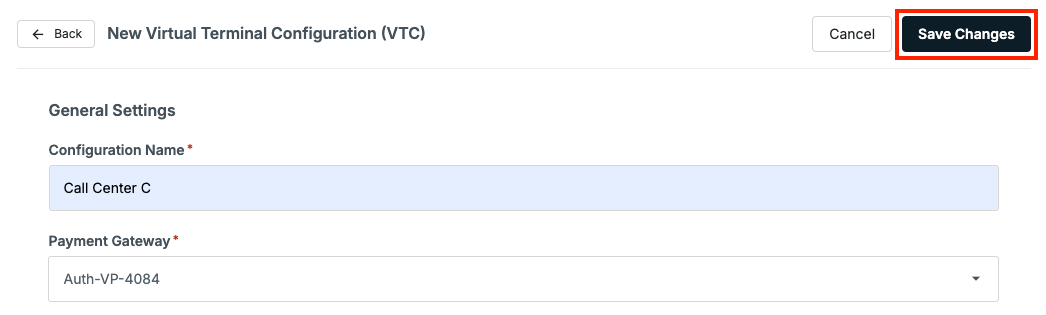
Once all the appropriate details have been entered, navigate back to the top of the screen and select "Save Changes" in the top right corner of the screen
Processing a Donation in the Virtual Terminal
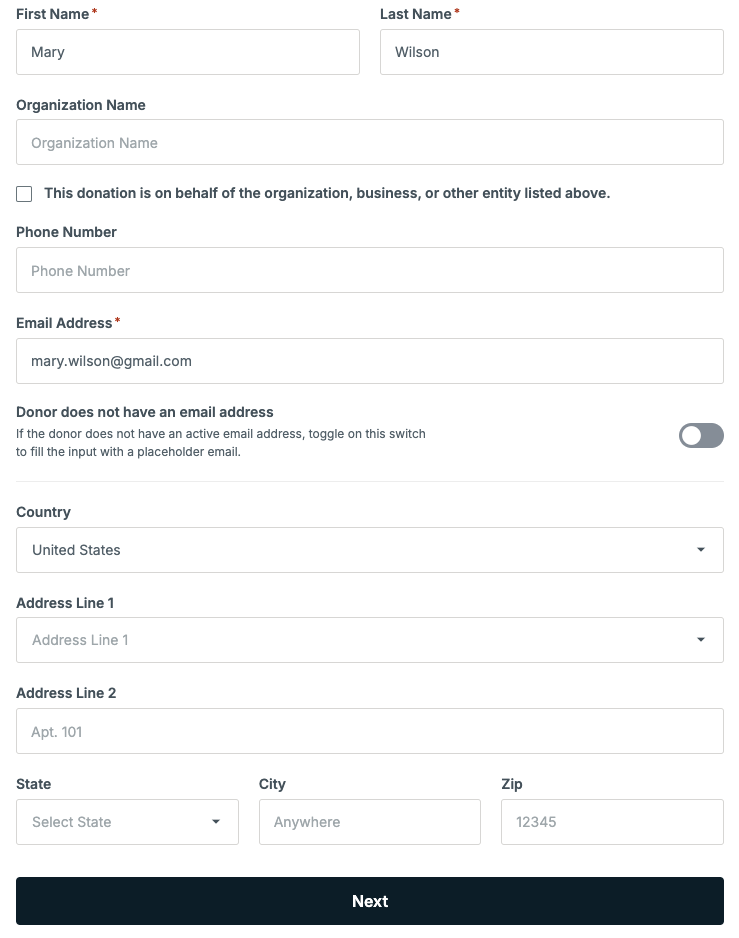
Step One - Donor Information
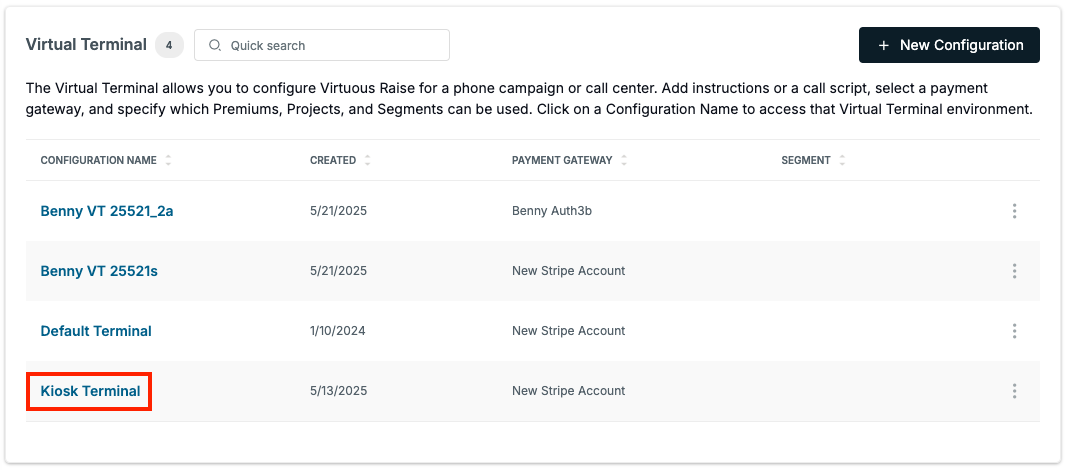
To process a donation via the Virtual Terminal, navigate to "Settings" and select "Virtual Terminal" using the left hand menu.

Select the appropriate Virtual Terminal Configuration for the donation use case.
In the "Donor Search" field, start typing in the name of the Donor. Once you have located the correct Donor record, select it. This will then populate their information on file.

If your donor name does not appear in the dropdown menu, you're able to create their record by filling in the donor information below. If this donor is giving on behalf of an organization or business, enter the Organization Name and select the checkbox below.
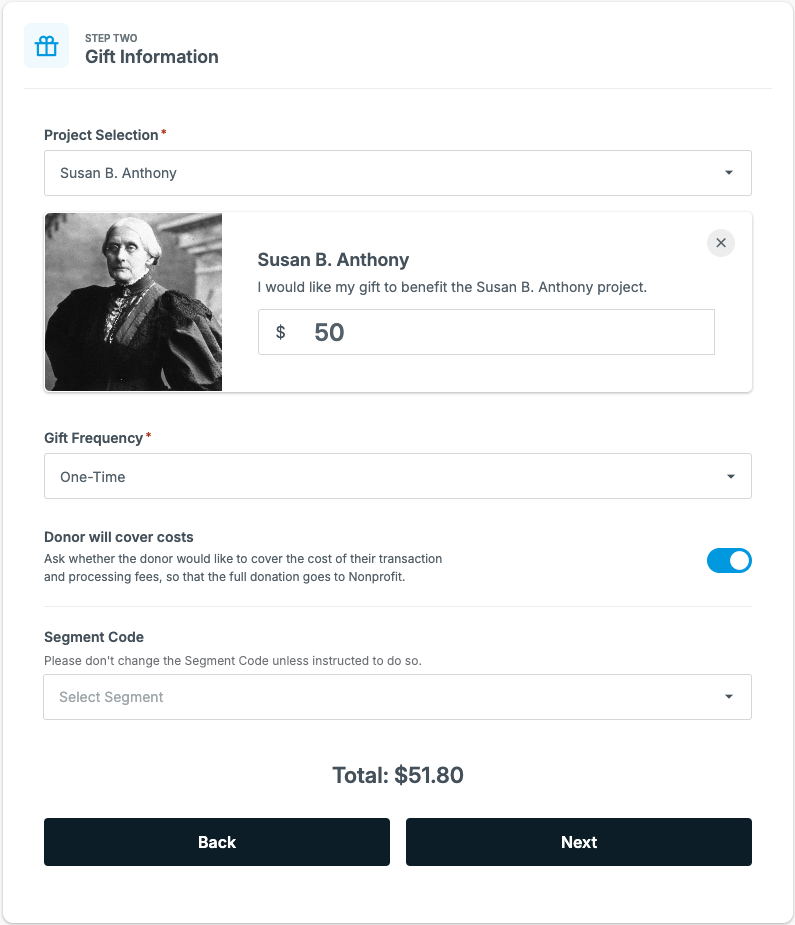
Step Two - Gift Information
Fill out the required details. After selecting the appropriate Project designation, you can then enter the Gift Amount.
If the donor opts to cover the processing costs, toggle the slide bar to the right of this option.
If necessary, enter a Segment Code.
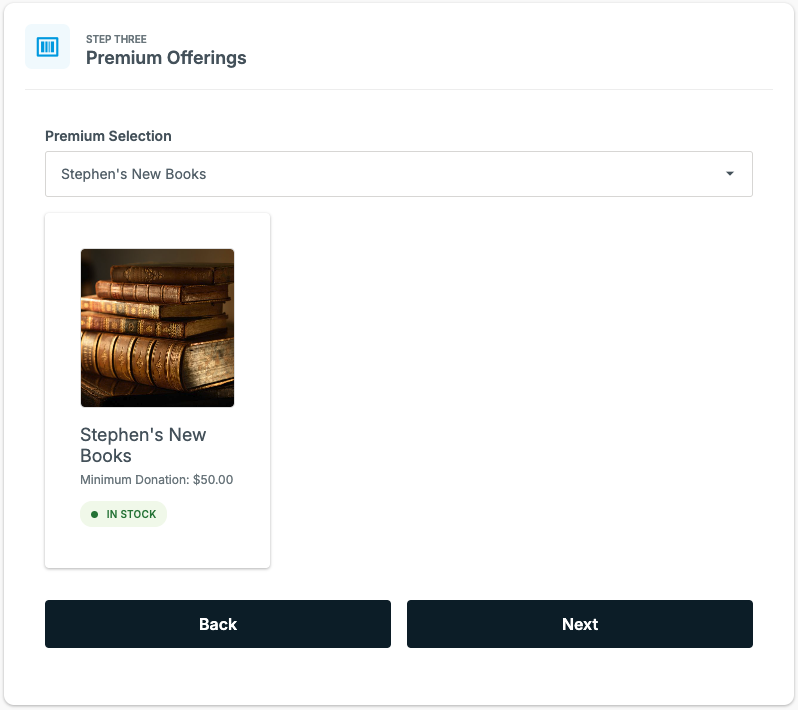
Step Three - Premium Offerings
Next, select any Premiums appropriate for the donation being processed. If no Premium is needed, you can select "Next" without making any selection.
Step Four - Payment Details
Finally, enter the appropriate payment details. Select either the "Card" or "US Bank Account" option, depending on the donor's preference.
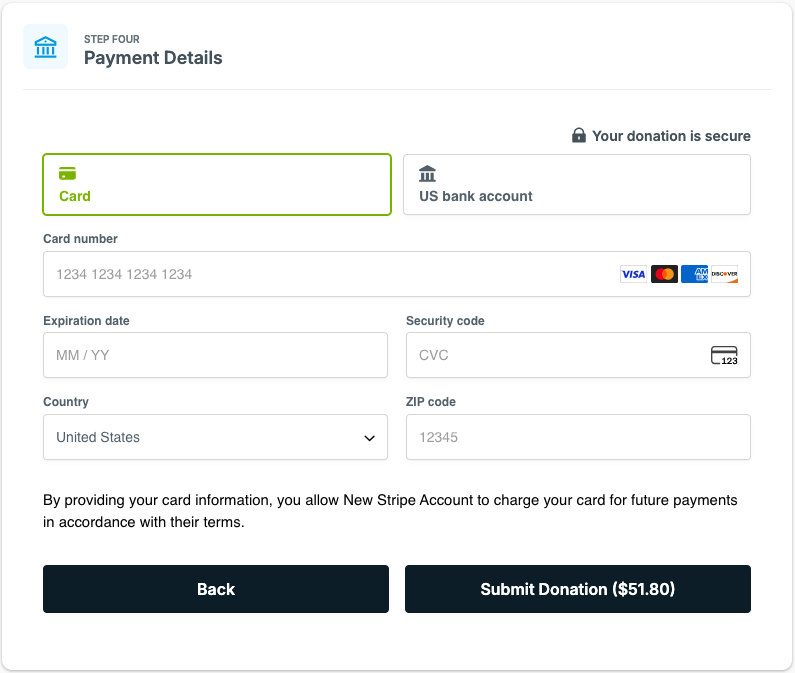
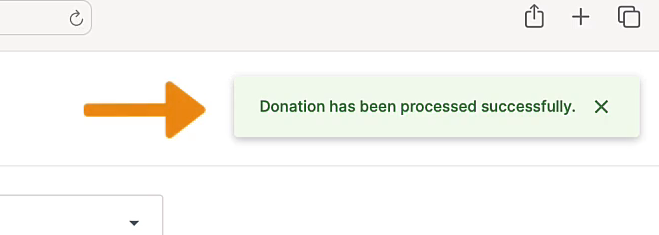
After all the appropriate details have been entered, select "Submit Donation" to complete the donation process.
You'll be taken back to the main page of the Virtual Terminal and a confirmation message will display in the top right corner of the screen.